Showing posts with label wildcrafting. Show all posts

Saturday, November 1, 2025

Pine Needle Basket

 Coiled Basketry has been found worldwide in a variety of indigineous cultures including Uganda, England, Australia, and many regions in the United States.  They form a very tight container and can include delightful colors and patterns.  Along the western states, these baskets have been made from the long Ponderosa Pine needles.  Trees will naturally shed a great number of these needles each fall and they can be collected from the ground.  


I collected these needles at our SCA Principality's Fall Coronet in Chiloquin, OR.  The first step is to make sure most of the needles are fully intact and mold-free, and it's best for them to be completely dried before beginning.  Once that is assured, soak the needles in warm water for at least an hour or until they are a little more pliable.  As the basket gets wider, this is less necessary, but it keeps the long needles from snapping.  

The materials you'll need for this are:
~Lots of pine needles (I used a large, double handful for this tiny basket)
~Thread of choice - waxed or sinew is preferred, I used embroidery floss
~Needle
~hollow threader - large feather shaft, tightly rolled piece of paper, portion of drinking straw or pen exterior.  The interior circumference of this will determine your fiber bundle size.
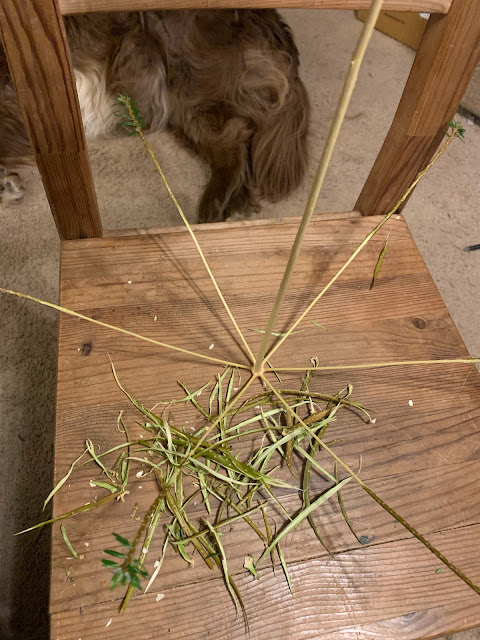
    When the needle bundles fall from the trees, they have a papery covering over the tree-end.  This should be removed from each set of needles before working.  Stuff the tube with needles so they are all going the same direction, lining up the tree-end on one side.  The tube should be snug, but not so tight that the needles can't continue to slide through.  With all the tree-end (connected) needles, start tightly wrapping with your thread, tucking the short end under the wrapping.  Continue this for about an inch before folding the wrapped area over as pictured above.  Thread needle on long end and past through wrapped areas several times to secure.  Continue wrapping and stitching until secure.  


    As you work, add more pine needles going the same direction into the center of the tube bundle any time it loosens up.  When you run out of thread, try to tie a new strand on in a way that the knot will be covered as you continue to work.

  
  After the center of your coil is tightly secure, continue wrap needles around and secure with stitches by going around the new and back under the last coil round.  It will look most consistent if you put each additional row's stitches coming through the stitch of the previous row, splitting it.  Eventually you will need to add extra stitches in between.


    Continue until the base of your basket is the desired size. 

At this point, you will need to pull the needle bundle on top of the previous row as you stitch along in order to begin shaping the sides.  Continue in this direction until the desired height is achieved.  Continue stitching around until all needle ends are tacked down.
  
    Enjoy your coiled basket!  I found this to be very strong and sturdy.  It could hold very tiny things without them falling through, perhaps even liquid if it was made well.


Tuesday, May 28, 2024

Bog Hat


I've been wanting to make myself a sun hat for about a year now.  I'm not a basket weaver, so I started researching and testing materials that grow in abundance where I live, twining ropes and making mini baskets.  


Most examples of sun hats in the Middle Ages seem to be made of straw.  In the SCA (Medieval recreation) my persona is from 11th C. Ireland on the west coast where large scale grain agriculture was less likely.  But there are coastal sedges and swamp rushes in the bogs, conveniently, the same variety that grow wild here in Oregon.  There are many instances of these rushes being used for basketry in the area, and this includes a few references to hats.  

Early this spring, I foraged the thin Pacific blackberry vines, pasture rush, and lakeside sdges and hung them to dry.  The day before I began, I soaked them in a bin of water to soften them.  I began with a simple weaving of the thorn-stripped vines, and twined a few rows of the rushes.  This was accomplished by maintaining a strand of at least three stalks at all times, twisting and weaving through the spokes. I  propped this on a bowl and used the sedges for the vertical part of the hat.  They were chosen for their length, however these were more brittle and difficult to work with.


When I reached my desired depth, I re-wet the spokes and added more to allow fanning as well as reinforce the walls.  By this point I had run out of the sedge and was back to using more of the rushes.  I gently bent the spokes to a 40 degree angle to achieve the flat brim and continued to twist and weave until it was wide enough.  I wove in the ends of the spokes to finish.  The hat was quite heavy at this point, but that changed drastically as it dried.  Once completely dry, I trimmed any long ends, except for the seed heads at the edge of the brim, which I left for character.  

I wore it first to this years' Egils Skallagrimson Tournament in the Barony of Adiantum (outside Eugene, OR) and it worked great!  We had quite a bit of sun and this hat kept me cooler and free from burns!  I'm excited to make another for my husband now.  It will be a little bigger and (hopefully) a little more uniform.  I received many compliments on it as well as requests to teach it to others.  Perhaps that will come after a little more practice!


Monday, March 11, 2024

Tenth Century Bone Comb Recreation with Period Paint and Bag

 Bone Comb

Muirenn inghean Uí Cléirigh

2024


Where combs are found, archaeologists and historians find the society of a culture: they  interpret that the previous owner cared about their appearance.  While combs have been made from several materials (antler, horn, wood), bone is common for its strength and carvability. (3)  The comb created for this display was inspired by a find from Knowth, Co. Meath (fig.1), and is a single piece comb (“ci”) with no side plates.  This style comb had dimensions of 41-56 mm in length. 35-43 mm in depth and between 4-5mm thickness with short tines. (1). Based on similar finds, it is estimated to be from the 7th-10th C. AD. (2) In early period (before the 11th C.) there were also references to comb bags (ci orbholg, “keer-wolg” {7,9) and these were highly prized among women along with their distaffs.  (1)  


Process:  This bone was acquired from our local butcher and after the dogs had cleaned the flesh and marrow to the best of their abilities, the rest was placed in the ground to let worms and grubs finish the cleaning process.  When I was ready to carve, I retrieved it and cleaned the remaining dirt.  In the “Trials of Ireland” mentioned by Dunlevy, comb-makers were known to leave their materials in the dung heap to keep it soft until it was time to carve. (1) Only the outside of any bone or antler can be used for this type of carving as the center is either too soft or porous. (3)


Since I don’t yet have hand carving tools (period files and saws), I did use a Dremel (and  modern eye and lung protection) to carve the comb.  This took several hours with an electric tool, so I can only imagine how long it took  with hand tools.  While a pronged drill would have been used to get the circle engravings, I did as similar shapes and designs as I could based on the findings in Ireland.  The length of the tines are curious to me, but after some experimentation, we found that it worked perfectly as beard comb.  It could function for long hair, but not as well as a comb with longer tines.    I utilized motifs from Irish comb finds in my design. (Fig 2.)


After carving, I polished all edges of the bone and gave it a thorough cleaning.  To further decorate, I prepared pigments.  The ochre was harvested from the ground near our home. This was one of the earliest pigments used, and is found as a silicate compound in clay beds. (6) The verdigris was made by suspending copper wire over a basic (high pH) solution.  I used ammonia, but stale urine was often used in period.  Alternately, a more green pigment can be produced by following the same process over an acid like vinegar.  (5)  After left for a few weeks, I could scrape the pigment powder from the wire.  And finally the bone black was made from the trimmings from the comb.  After fully sealing them from air, I left them in the fire for a few hours.  This charcoalized the bone and I could then crush it into a pigment powder. (4) All pigments were then mulled with quail egg white.  This strengthens the paint and allows it to seal to some extent.  Although some bone from historical artifacts has been stained, I was unable to locate examples of painted bone.  However, the carved wells hold the egg tempura so perfectly, it seemed the logical next step in decor.

With the comb completed, I cut and sewed a simple comb bag, or ciorbholg, for it from leather and sinew. I created it very simply so the comb would fit snuggly into it.  Since none of the comb bags have been identified in archaeological excavations, I did some assuming with this design.  I wanted it snug enough that the comb would not easily fall out.  Many pouches of this time included a drawstring or a flap, but there are some examples of open topped bags from Gokstad and Birka.  (8,9)


Now I can add this as part of my eleventh century Irish garb. Or, perhaps since it seems to work better as a beard comb with its short tines than long hair, my husband Eoghan will wear it with his kit, as these combs were known to be worn by both men and women.  In the future I would also like to attempt a longer comb, perhaps with scales or folds.  Possibly, eventually I could graduate to more period tools as well.   


Resources

  1. Dunlevy, M.  (1988) JSTOR.  “Proceedings of the Royal Irish Academy: Archaeology, Culture, History, Literature.  Vol. 88C, pp. 341-422.  Last visited 2-29-24 from https://www.jstor.org/stable/25516048?seq=5
  2. Bermingham, N “Fermanagh in 100 Objects: The Drumclay Bird Headed Comb.”  Last visited 2-29-24 from https://www.enniskillencastle.co.uk/media/34463/Drumclay-Bird-Headed-Comb-Research-Report.pdf
  3. Levin, B. (3-31-2003) Regia Anglorum Publications.  “Bone and Antler Working”. Last viewed 2-29-24 from https://regia.org/research/life/bonework.htm
  4. Cochran, C. (2024) “Bone Black: The Deepest Black” Last viewed 2-29-24 from https://christophercochran.me/color-history/bone-black/
  5. Douma, M.  (2001).  “Pigments through the Ages: Verdigris”. Last viewed 2-29-24 from https://www.webexhibits.org/pigments/indiv/overview/verdigris.html
  6. Douma, M.  (2001).  “Pigments through the Ages: Yellow Ochre”. Last viewed 2-29-24 from https://www.webexhibits.org/pigments/indiv/overview/yellowochre.html
  7. Archaeological Consultancy Service (2024), ACSU in Archaeology Ireland.  Last visited 3-6-24 from https://archaeologicalconsultancyservices.ie/acsu-in-archaeology-ireland/
  8. Vikings Wiki (5-22-2020) Pouches.  Last visited 3-7-24 from https://wiki.vikingsonline.org.uk/Pouches *** Not that this had references to the Swedish History Museum whose page I could not translate or search in English
  9. Bartlett, S. (2006)  “Early Gaelic Dress: An Introduction”— pg 17.  Last visited 3-7-24 from http://www.coblaith.net/EarlyGaelicDress/EarlyGaelicDress10col.pdf
  10. Riddler, I. and Trzaska-Nartowski, N. (2013)  “The Insular Comb” (from Early Medieval Art and Archaeology in the Northern World.). last visited 3-7-24 from https://books.google.com/books?hl=en&lr=&id=taSGEAAAQBAJ&oi=fnd&pg=PA259&dq=Medieval+Irish+comb&ots=zaV1VHVFRB&sig=wxH5ACH6z6_g2K3ztyZjKrOilOk#v=onepage&q=Medieval Irish comb&f=false

Monday, September 25, 2023

Tvare (Fir Whisk)

    Have you been following the findings in Lendbreen as the glacier is melting?  You can read up on it on the "Secrets of the Ice" website A little bittersweet, but archaeologists have been discovering all kinds of artifacts that are incredibly well preserved because they've stayed frozen for so long.  Most have to do with caribou hunting camps, but one find has really jumped out at me.  The archaeologist have determined that it was the remains of a Tvare, a Scandinavian whisk!  And the process is so elegantly simple!  The Saxon Forager also has a great video about these Here.


STEP ONE: Find a nice evergreen tree whose branches come out in an even whorl.  If you're going to be using it for food, make sure it's not a yew or other toxic wood.  A fun option is to use the top of your Christmas tree when you're done with it or need to trim the top!

STEP TWO: Cut the length you want your utensil to be below the whorl.


STEP THREE: Remove the needles and save for tea.  Trim center trunk/handle as desired.  You really have two options here.  Choose the side of the whorl that will make the right diameter handle for you: not too spindly and not too thick.


STEP FOUR: strip all bark.  I started to do this with a knife, but found it came off easier just peeling it by hand.  It was a little sticky, but smelled AMAZING!  I also whittled down the end I wanted to be flatter under the whorl of branches.


STEP FIVE: Drawing up the tines to the handle and pushing out a little bit to get them to the right angles, I held and wrapped with wire and allowed to dry completely for a week or two.  


I made a second Tvare out of the next whorl down on the tree, using the section of trunk above the branches for the handle as an especially large whisk with short, unbound tines for my big cauldron.  


It worked great!  I can't wait to make more of these in the future!  Maybe even make it a New Years tradition to make one from the top of our Christmas tree.