Wednesday, September 13, 2023

Mrs. Fogarty's Christmas Cake

Anyone else not a fan of the 20 Christmas songs that get played to death in December?  We're always on the hunt for unique Christmas songs, and last year, Mrs. Fogarty's Christmas Cake by the Irish Rovers! You can listen to it on You Tube Here


So we had to make a loaf for Christmas Day!  We started with a basic Amish Bread (great Amish Cinnamon Bread recipe) then added in all the extras heard in the song!

Batter:
1 cup butter, softened
2 cups sugar
2 eggs
2 cups butter milk
4 cups flour
2 teaspoons baking soda

additions:
1/4 cup plums and prunes (we just used the dried prunes for both), diced
1/4 cup dried cherries, diced 
1 Tbsp citron (we used lemon) rind shavings
1/4 cup rasins
2 tsp ground cinnamon
1/4 cup chopped nuts (we used cashew)
1 tsp ground cloves
1/4 cup dried berries (we used cranberries)
1/4 tsp caraway

"Glue" glaze
2-3 Tbsp milk (divided)
1/2 cup butter
2 cups powdered sugar

Batter:
Grease two bread pans. In mixing bowl cream butter, cups sugar, and eggs, then add remaining batter ingredients and mix well.
Additions:
Put 1/4 of batter in each greased loaf pan.  Combine all additions that you're going to use, then layer half in each pan.  Top with remaining batter.  Bake at 350 degrees in a preheated oven for 45-50 minutes or until toothpick tester comes clean.  Once cooled, spread glaze on top and enjoy!

This was so fun and way more edible than described in the song!  Haha!  Do you have any other unique Christmas songs for us to listen to this year?

Monday, September 11, 2023

Whole Wheat Sourdough

Whole Wheat Sourdough is so tricky!  There're sooo many variables involved!  I have found a method that I love and I'd love to share it with you!


My main trick with making sourdough 100% whole wheat is that the starter needs to grow from whole wheat yeast and  will do even better if it is local!  Did you know that each sourdough microbiome (lactic acid bacteria and yeast) is unique?  And it adapts to incorporate the local, airborne mycology.  That's why, even if you brought sourdough starter from San Francisco, within a short period of time it's flavor and texture will adjust to whatever the local yeasts taste like!  (1)

My second bit of advice is to make sure your starter stays highly hydrated. Equal flour to water ratio seems to work well, but the better hydrated the starter is the higher the acidity (tartness). (2) While the starter will collect natural, wild yeasts and bacteria from the ambient air, I like to give mine a boost with the natural microbes from the blue elderberry that are ripe this time of year. (3)  When I harvest elderberries for medicinal syrup, I soak the berries in water.  Afterward, I take the strained water to mix with the whole wheat flour to begin my starter.


 Whole Wheat, Herbed Sourdough


Whole Wheat Sourdough Starter:

Ingredients:

1. 3 cups whole wheat flour, divided

2. 3 cups water, divided

3. 1/2 cup elderberries


Soak elderberries in water overnight to leech the natural yeast.  Strain and use elderberries in another recipe or freeze for later.  Mix 1c water with 1c flour in a large jar and cover tightly with cheesecloth or linen, allowing to rest in warm place.  Each day for the next 4 days, remove 1/2c to use in a separate recipe and stir in a new 1/2c flour and 1/2c water.  Then use for following bread recipe or store in the fridge, repeating the feeding process once per week, allowing rest in warm place for at least 4 hours.


Whole Wheat Herbed Sourdough:

Ingredients:

1. 3 1/2 cups whole wheat flour

2. 1 cup water

3. 1 Tbsp salt

4. 4 Tbsp dried herbs (I used rosemary, thyme, and lemon balm)

5. 1 cup starter (at least 4 hours past last feeding)


  1. Mix all ingredients: dough will absorb more water over time.  Adjust adding flour or water until it’s just thicker than batter, but very moist dough. (Morning, day before)
  2. Fermentation: once mixed, cover bowl with towel and rest in warm place 30 min.  Stretch and fold, then rest 30 more minutes.*  Repeat stretch, fold, and rest 30 min two more times. After the third time, allow dough to continue to rest another 4 1/2 hours in warm place.  *If dough is too runny to stretch and fold, slowly add more flour, 1/4 c at a time.  (Morning, day before)
  3. Shaping: remove dough from mixing bowl and shape on counter.  May continue to dust with flour to keep from sticking.  Rest 30 min, then flip seam-side-up into large bowl. (Evening, day before)
  4. Proofing: cover in linen and allow the dough to proof overnight or up to 24 hours in fridge or cold place.  (Evening, day before)
  5. Scoring: preheat oven to 450*F with lidded dutch oven inside.  Remove dough from fridge and flip it out onto parchment paper.  Score as desired, at least once.  May sprinkle with additional herbs at this time.  When dutch oven is to temp, carefully remove from oven and set parchment paper with dough inside.  Cut of excess paper and replace lid (Day of)
  6. Baking: Place lidded dutch oven inside preheated oven and bake at 450*F for 20 min, then remove lid and bake another 20 minutes.  Remove from oven and allow to cool at least 1 hr. Before slicing.  


  1. Dees, J. PhD. (June 26, 2020) American Society for Microbiology.  Last Visited September 11, 2023 from https://asm.org/Articles/2020/June/The-Sourdough-Microbiome
  2. Modernist Cuisine (September 26,2018) "Sourdough Science". Last Visited September 11, 2023 from https://modernistcuisine.com/mc/sourdough-science/
  3. Haaker, Meredith L. (December 2022) Raising Native Plant Awareness as a Method for Re-Naturalization. Last Visited September 11, 2023 from https://digitalcommons.calpoly.edu/socssp/169/

Saturday, February 19, 2022

Polypore Paper

 Good Morning!  It's been ages since I've updated, but I've made some fun discoveries from my kitchen conceptions that I'd love to share with you!  I don't want you to have to wade through a lot of fluff so I'll just jump right in today with my method for mushroom paper!


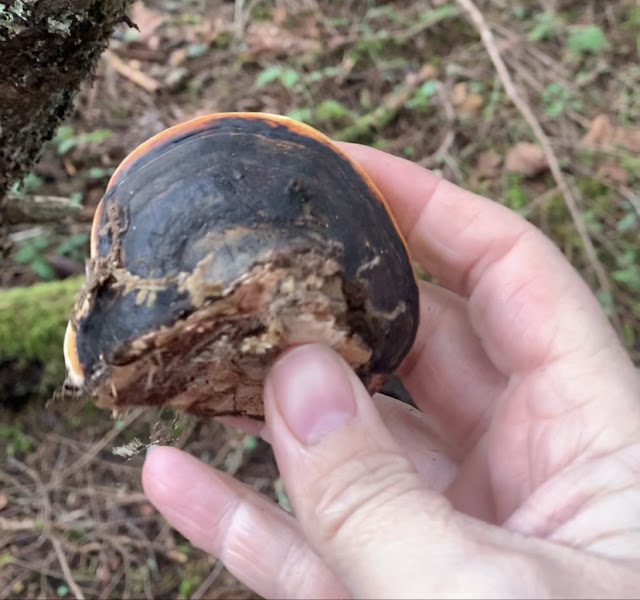
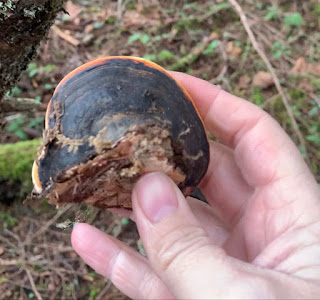
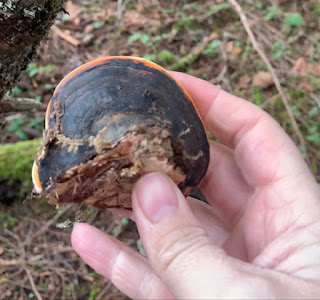
Red-banded polypore are abundant in the PNW (but please, always use sustainable foraging practices!), although from my research, I understand that most bracket fungi work wonderfully as a paper!  I usually find them on the sides on dead, standing fir, but sometimes on larger downed trees.  The young ones pop off pretty easily, but I've had to use a mushroom knife older varieties.   This small one was easily harvested and relatively easy to dice.


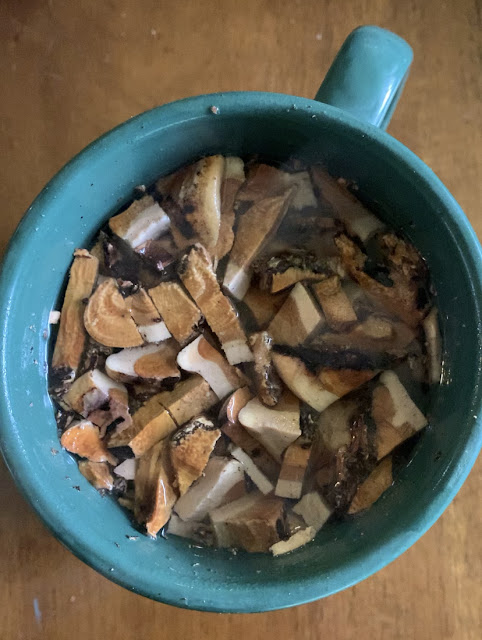
Once I got it in and rinsed of excess dirt, I spent a minute shaving off a bit of the black topside.  I didn't get everything, but I was looking for minimal variance in the color of my paper.  I diced the remaining conch and poured boiling water over it, letting it set until cool with the goal of loosening up the fibers.


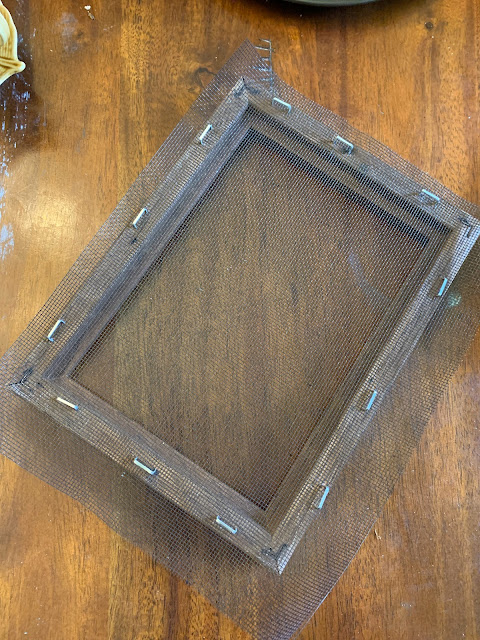
I prepped a makeshift paper mold.  Not ideal, but it worked in a pinch.  My main focus is ink making, but I might be focusing more on paper now, too! 


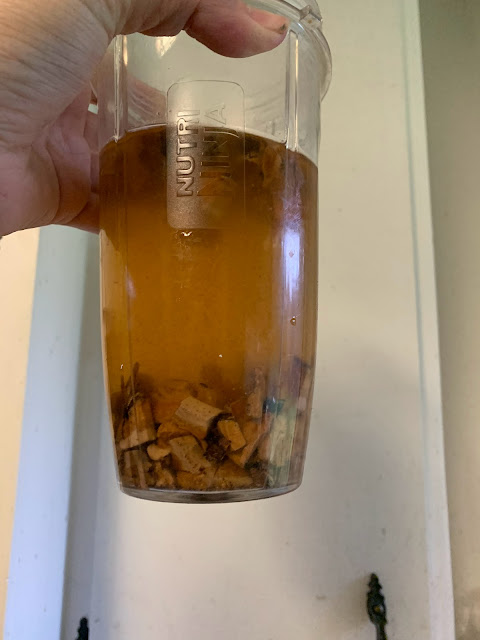
After the soak.  I ended up refreshing this waster before blending, since I wanted as light of a color as possible without bleaching.


Blended a couple cycles.  I suppose if you wanted to go at this very traditionally, you could have strained off the water after soaking and used a mortar and pestle?


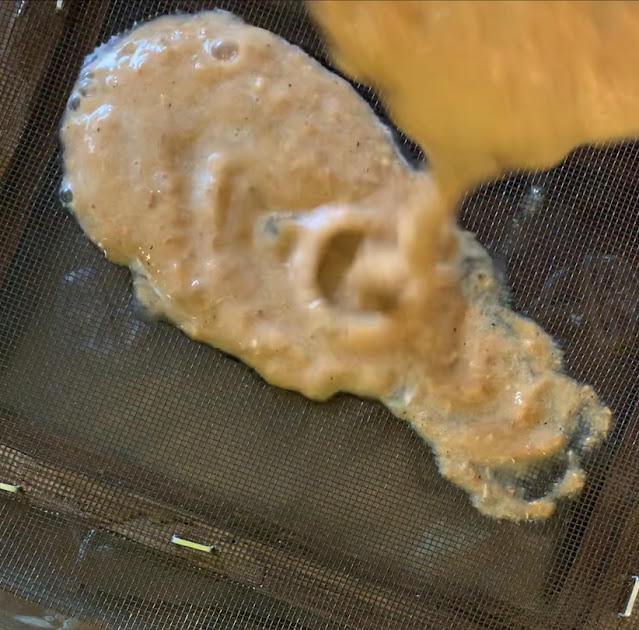
The pour.  Yeah, it definitely looks like sick at this stage!  *Note:  I'm quite certain this isn't proper papermaking procedure, just the best I could do with the research and resources I had.  


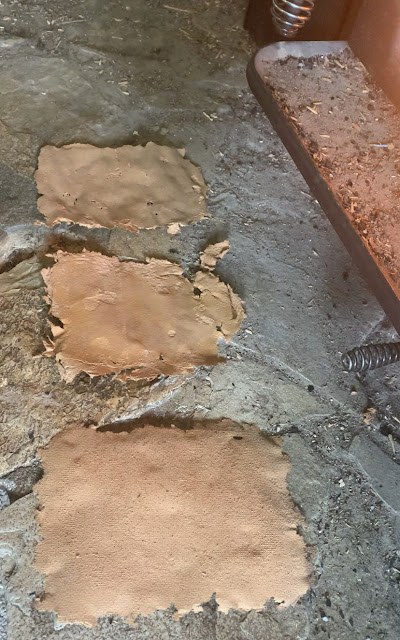
I found giving it a shake only made the material bunch up together, so I had to carefully pat even by hand.


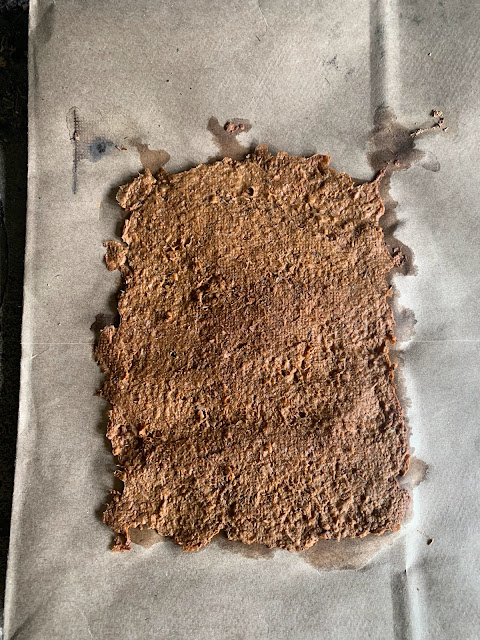
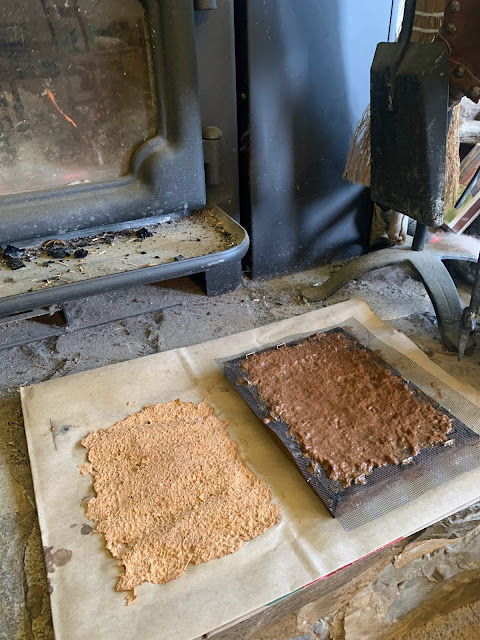
Drying on a paper bag in front of the fire.  Hm, it's a little lumpy, so I simmered the remaining for about a half hour.


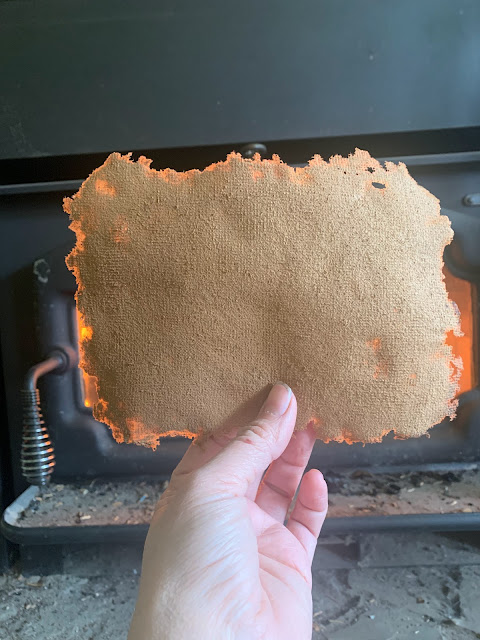
But, WOW!  Look at that flexibility!  


I should mention that I tried a few ways of drying: on the screen, on the bag, and pressed between the two, at least until I could easily get the screen off. 


Page #2 dried, held up in front of the fire.  Much more consistent and even thinner than the first!  I thought about trimming the edges, but I kind of like the look as they are.


I got three pages out of that little polypore, plus enough pulp in the freezer (trying to break it down even further) for a couple more!  Next, to see how it takes to ink!  Mushroom ink, naturally! =)


Thank you all for reading through!  Below are links to more resources on the topic:

"The Organic Artist" by Nick Neddo: https://www.nickneddo.com/shop/the-organic-artist-book

Mother Earth News article on mushroom paper and ink making: https://www.motherearthnews.com/diy/how-to-make-mushroom-paper-and-ink-ze0z11905zwoo

Fungi Perfecti's article on mushroom paper making:  https://fungi.com/blogs/articles/making-mushroom-paper


Saturday, April 22, 2017

A New Adventure


I barely painted anything for years.  Between starting out as a brand new RN to having our two little ones, there never seemed to be a good time.  As they're getting out of the baby/toddler stage, I'm starting to find more moments when I don't have to be super vigilant for little mouths eating paint and smearing it on the dog.  After vending my crafts at couple events and barely breaking even (if that) I was encouraged by several to focus more on my art.  This change in directions was somewhat difficult for me for a variety of reasons, but I trusted them and shifted gears.  As I wrote about before, I decided on a whim to enter an art contest to design a tee shirt for the Oregon Poultry Swap, and it won!  

Well, then I decided I should apply to vend at their events, since it was also a homesteading fair and most of my work followed the rustic theme.  As I was brainstorming over Christmas, I had several people laugh at my idea of making chicken art, but my husband continued to encourage me.  

They were a hit!  And the event was so much fun! 

So here's basically how my process goes:

I try to reuse a many material as I can from Bring (material recycling),  or end-pieces from other projects. So usually I need to cut them down to the requested size.  If they're not already weathered, I have a process to achieve the same effect.  After sanding, I saturate the surface in my steel and vinegar solution and allow it to dry.   

Then I measure out where I want everything laid out and slowly, slowly, the image takes shape.  

To finish up, I add a layer of protective finish over the top and attach a hanging device.

It's been so much fun to receive custom orders for these signs and to memorialize everyone's special animals.  


I have now finished two OPS homesteading fairs and have the McKenzie Highland Games and the OPS Chickenstock coming up!  I'd better get back to painting!  See all my barn signs here and my entire portfolio here!  

Saturday, January 28, 2017

Phew!  This flu season has been the worst!  Since the New Year we have been taking turns being flat-on-our-back sick in this house.  I think I can officially say that we've all made it through the flu and so the worst must be behind us.  It sure makes me grateful for our overall health and the incredible ability of our bodies to heal.  And also good friends who patiently rearrange plans, send essential oils, suggest alleviating concoctions and bring elderberry syrup.  What a blessing to have them in my life!

It sure got me itching to finish some projects, too.  Why is it that I become most motivated when I can't possibly work on a project? =)  As soon as the dizziness left me and I felt safe to drive again, we hit the craft store, thrift store, and recycling center to restock and get to work on some projects.  I don't really have an instructible this week, but I just wanted to let you know that I haven't dropped off the face of the earth.

First, I've managed to keep up on our rabbits and continue to learn about them daily.  I've discovered we have a flighty one in the bunch and have already received many a nip from little Bobbin.  Trying to handle him more so that he becomes more used to us.  I found some wire mesh at the recycling center and have been attempting to secure our little porch for them to stretch their legs in a little.  Now all I need is a gate!

The Oregon Poultry Swap has chosen one of my paintings for their 2017 special edition print for this year!  I'm very honored and am looking forward to my tee shirt with the design on it!  I decided to sign up as a vendor for their Winter Swap here in Eugene and so a lot of my time has been put toward getting ready for that.  I found this awesome, weathered plank at the recycling center.  Gwen and I sawed it down into reasonable pieces and I've been painting barn art on them.  I've already received a great response and several pre-orders!

Then some more painting, crocheting, baking dipping tallow tapers, and practicing face painting for the meet.  It sounds like so much fun!  There's going to be a kids area, seed swap, scavenger hunt, raffle, demonstrations, decoration competitions...   If you happen to be in the area February 11th you should really look it up!


Friday, January 6, 2017

New Year. New (Fluffy) Adventures

Happy 2017 everyone!  How was your Christmas and New Years?  We had a lovely trip up to Washington to visit family, but unfortunately my camera's cable was left behind, so that story will have to wait for now!

This past week we've been getting everything in place for our latest adventure, though: RABBITS!!!  This project has been in the works for quite some time after I finally worked up the guts to ask our landlord for permission to keep more critters (I had been feeling like just the moose of a dog and two cats were really pushing it) but he was totally fine with the idea!  Rabbits are such quiet, easy keepers that take up minimal space and make minimal mess, I think they're going to be a great addition here.
Setting up the new homes

After permission came a LOT of learning.  I'd never really considered rabbits in the past, but we've been looking to raise more of our own food as we can and rabbit it great for this.  I know some will have a hard time with the idea of this, and honestly I do, too.  But I think that's okay and even good.  It's good to understand where our food comes from, to not take it for granted, appreciate the work that goes into caring for meat animals and know that our creatures were raised and harvested without suffering.  This breed (Satin) is ideal for both meat and furs while still being rather docile.  These particular rabbits have been raised among kids, dogs, cats, chickens and even horses so they seem to be very calm overall!
Curiously contemplating his new cute critters!

So, what do rabbits actually NEED?  It is possible to go really crazy, and there are many differing opinions out there. Obviously, I'm no expert now that I'm officially one day in to rabbitry, but I found some of these articles to be helpful and hope this condensed version of my research might assist others getting started.

Handling/communication:
An Uplifting Experience
Rabbit Talk

Grooming: 
Grooming a Rabbit
Rabbit Grooming Basics

Feeding/treating:
Your Rabbit's Diet
Rabbit Approved Plant Guide
Raising Rabbits on the Homestead

Housing:
Raising Rabbits (good overall care info)
Rabbit Hutch/Cage Size Guide
Raising Animals as Gardening Allies
Homestead Rabbits
Rabbit Tractor in Action


Also of great help was the lady we bought these from.  Angela at White Ranch and her kids show these Satin breed rabbits in 4-H and two of the four we bought have won various awards.  She taught us desirable qualities that generally are associated with better health (large back feet, symmetry, healthy teeth, soft over and undercoat) as well as how to hold them (they have STRONG back legs and sharp claws), what to feed them, how to house them, grooming, etc.  They suggest picking up but the scruff only if necessary and only briefly, then support the body and keep the rabbit close to your body.  Despite being so strong, rabbits are fairly fragile and can actually break their spine struggling against being held the wrong way or falling down.
They set up their camping chairs and just sat quietly "letting the rabbits get used to them" at 25 degrees and snow!

I also learned a lot about rabbit housing from her.  I started out buying a little tractor (like a little hutch on wheels that can be used like a rabbit lawn mower).  Now that I have a better concept of how much space a rabbit needs, I really couldn't put more than two rabbits in there.  And since we're not having these rabbits fixed so they can breed later on, that means only male or female at a time.  But then I found out that, while rabbits enjoy seeing other rabbits around them, they can actually be quite vicious when sharing space.  To the point that they will fight and cause open wounds.  So it's really best to keep them together, but separated.  Enter this craigslist score of cages on pallet stands made by my wonderful husband and father!  So we'll still use the tractor as a place for each rabbit to get out and stretch and explore, but it won't work well as a sole housing environment.  


So we finally brought home our four Satins as two breeding pairs, meaning we will keep them for their lifespan and they will be the ones that will likely become more like pets.  I'm pretty sure we're settled on names.  So without further ado, allow me to introduce...

Geode: proven male


Gem: proven female


Bobbin: young male


Calico: young female


Better photos to come, but I just couldn't wait to share with you our latest endeavor!  Have you ever cared for rabbits before?  Any advice you'd like to pass on?  I'd appreciate every word right now! =)