What a blustery day it has been! Our huge dog (who regularly drags logs around the yard and helps me haul firewood) thought it was a great game that the trees were raining giant branches down on him! Like they were bestowing on him gifts of new toys! Ah, he can be troublesome, but he sure brings a smile from time to time.
But the shenanigans didn't stop there. Though we went and played outside a couple times through the day, the little ones seemed to have a little extra mischief also. Like taking a break in their recently discovered "bumk beds" (aka bookshelf) and playing in my blanket chest. Well, one did while the other promptly shut the lid and sat on top!
To get to my plans coming up, I'm very excited to have just registered for my very first craft fair! I haven't even been officially accepted yet, but it's had my head spinning with new creations that need my immediate attention. My table is currently covered in cuts of cloth and curiosities (ooh, five alliteration points!) even though the date is more than a month off. I've always loved craft fairs and the unique creations and styles one can find there, and I've toyed with the idea of renting booth space for years, so I'm just giddy about it actually happening now!
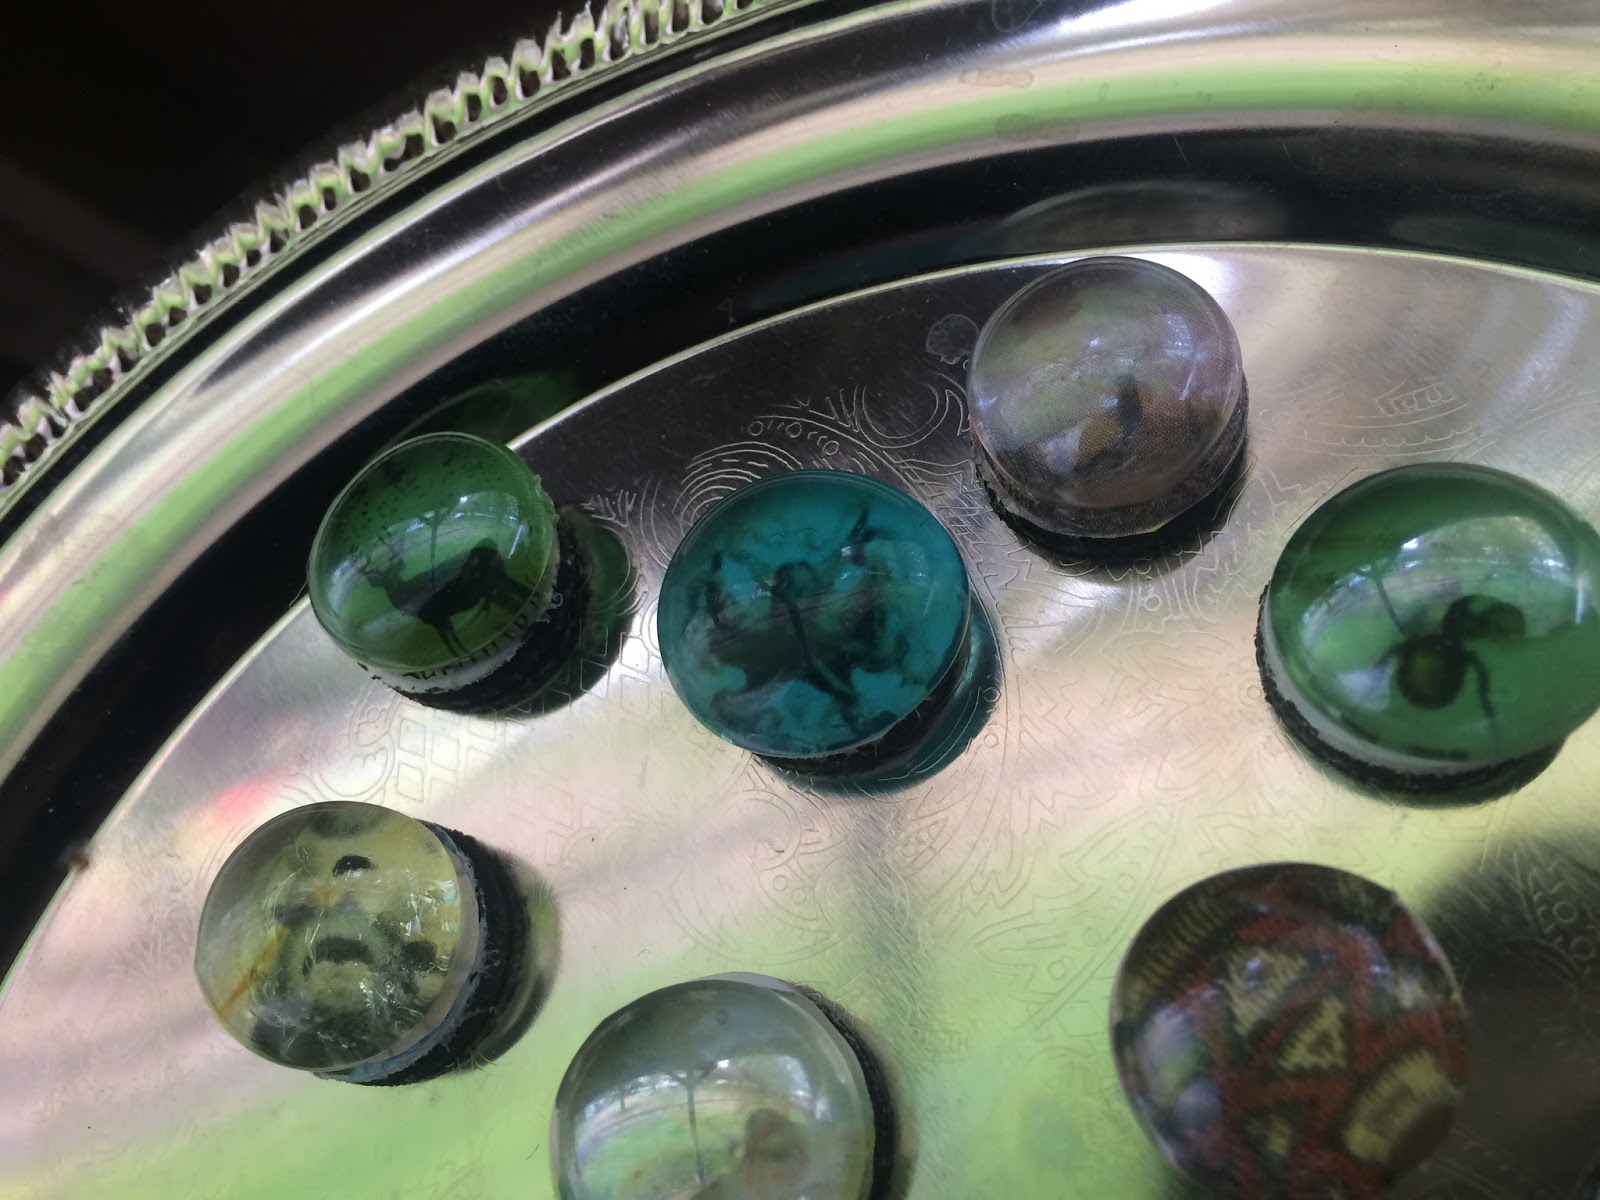
I have yet to figure out my niche (see 2 posts ago), but today my oldest and I worked on a fun project that I believe we'll display on our table. These Miniature Magnets are quite simple, yet functional and fascinating.
You'll need:
~small round magnets
~flattened glass marbles (Dollar store!)
~tiny pictures
~hot glue gun and glue sticks
I believe the biggest challenge was finding images small enough. Even when you shrink images on the computer they become very pixilated in the process. Magazines worked well. No two are alike! Test what your image will look like by placing the marble over it. The shape of the marble works to magnify the picture.
The top of the magnets have a sticky side with a sticker backing. When you remove the backing, place it over your image to trace the diameter of the correct size around your picture. Cut out and place on sticky side of the magnet. Then place a pea sized dollop of hot glue on the flat side of your marble and quickly press firmly onto the top of your image. Any bubbles in the glue will be pushed out to the sides.
I love how these turned out! Pretty fun to make, too! I'm curious, have any of you done a craft fair? I'm just hungry for any tips and pointers! Prepare yourselves for lots more crafty posts in the next month! =)
Wednesday, March 2, 2016
Wednesday, February 24, 2016
Beginning the Gardening Adventures (2016)
![]() |
| Daffodils blossom at the base of a fallen snag. |
![]() |
| Spring Queen |
And things are blooming! Daffodils and crocuses of course, but also camellias, violets, nettles, mock cherries, and several new to me as well! So I began to think, "well, maybe I should be growing things now, too?" And, though slightly early, when I looked at a planting chart for the area (great zoning and scheduling for US here) it could already be time to plant some of the seeds I had OUTSIDE! I love it! And I love how we can get hints about the timing of planting based on the wild things growing around us!
So my trusty helpers and I got everything together and got those seeds in some rich dark dirt. Mostly according to the directions, but when your over-eager assistants are 2 and 4, the depth and spacing measurements are kinda out the window. We'll see how things go! This is my first year really trying a container garden, too! My hope is that we'll be moving to our own plot of land by the end of harvest. It may be a long stretch, but I can dream, right? =)
![]() |
| It's good to coat my hands in earth again! |
With a few holes hammered into the lids and filled with water, they made perfect watering cans for the little ones: a manageable size that only released a drizzle instead of a deluge of water at once! Now we wait! I can't wait to be growing our own food again!
Any hints for a new Oregon gardener wannabe? Every thing seems so simple here as a whole! I'm comparing this to my Fairbanks garden where I had to dig several feet through peat moss to the permafrost, build a frame for my garden and line the bottom with 2" insulation, fill with dirt and surround with a fence to keep the arctic hares out all while fighting the swarms of mosquitos. Then every year our neighborhood moose and her calf(s) would eat the majority before I could harvest it! SO infuriating! I've been told the deer are an issue here, and I remember the slugs; is there anything else I should be aware of? I look forward to hearing your gardening adventures!
Wednesday, February 17, 2016
KISS Play Dress or Shirt (Keep It Simple, Sweetie)
Pretty sure I figured out (one of) my problem(s) this week. I often feel like I do nothing well, but I'm interested in doing almost everything. You've heard the phrase Jack of all Trades? Me to a t. It's becoming clear to me as I see the same attitude in my tiny daughter whose favorite phrase right now is, "Me got this." I got it, I'm good, I can figure this out by myself. Apparently, from my own mothers stories, my similar phrase at age two was, "Do it by myself." I'm sure it's quite common among two year olds, but I evidently never grew out of that! I have this desire in me to figure things out by myself and just be as self sufficient as possible. And most often this comes out in a joy to learn new skills such as cooking from scratch, animal tending, and homemade utensils and clothing. But then I'm on to the next thing, often without honing my skills to an adept level, but just enough to get by in a pinch if I needed to.
Ah, well. Perhaps expertise will simply come with age? Speaking of which, is it just me, or has time picked up the pace a little bit? It seems to be screaming by with a 4 and 2 year old growing in our home! Wow! Every day they amaze me! And every day I'm amazed by which of their clothes no longer fit! =) Even a non-parent friend of mine commented yesterday how absurd he found it to spend a fortune on a child's wardrobe when they so quickly out grow (or wear through) it!
And while children's clothes can be less expensive, great deals can be found a thrift shops, and little blessings of hand-me-downs sometimes appear, there's something very satisfying in making something specifically for your child. While I love knit and crochet, the investment of time alone into the project makes it a precious commodity that I tend to reserve for occasions such as church or the like. But more often than not, my children live in play clothes. I've made (refashioned) several simple play dresses for my daughter, but have been hesitant to share them on here because they're not perfect, not well-finished they're just comfortable play dresses that she will outgrow in a couple months! But for those of you who might have a similar interest and goal, I'll sketch out my quick process. Usually this dress takes me less than an hour, start to finish.
1) Select a shirt: I do this from my give-away pile. Some stains and small tears can be avoided depending on where you place your pattern. Select a long sleeved shirt if you want your new dress to have long sleeves.
2) Trace pattern: take a shirt or dress that currently fits (or mentally add a slight margin if you know you want it bigger), turn it inside out and fold it in half. Likewise, fold the adult shirt in half. Line up he collar and, after you've determined how long you want the bodice to be, trace arm holes, sides and waist, lifting the sleeves to trace the arm holes if necessary. Continue the waist cut all the way across the shirt. This bottom rectangle will be your (already hemmed!) skirt section. If you need to make it shorter, cut away desired strip size from the waist side. Then determine how long you need the sleeves to be and line up the top folded edge before tracing it'sbell shape onto the sleeves of the shirt. Don't forget seam allowance of about 1/4".
3) Cut pieces: remember to consider seam allowance.
4) Sew: With right sides together, I like to start with the shoulders and sides of the top first. Be sure you sew from the collar side toward the periphery on the shoulder seams so the collar is sure to line up.
New dress! Time: 1 hour, Cost: $0 Ready to play and I won't worry a lick if it gets muddy, stained or torn! This easily translates into a shirt pattern and you know it's going to fit your little one perfectly! Though I tend to make mine on the larger side so she can wear it just a little bit longer! =) I've used this concept for all the tops pictured. As I mentioned, I'm not much of a sewer (Haha! "Sewer!" I mean "seamstress!"), so if you have any questions or I can provide better instructions in some way, I would love to hear from you!
Ah, well. Perhaps expertise will simply come with age? Speaking of which, is it just me, or has time picked up the pace a little bit? It seems to be screaming by with a 4 and 2 year old growing in our home! Wow! Every day they amaze me! And every day I'm amazed by which of their clothes no longer fit! =) Even a non-parent friend of mine commented yesterday how absurd he found it to spend a fortune on a child's wardrobe when they so quickly out grow (or wear through) it!
And while children's clothes can be less expensive, great deals can be found a thrift shops, and little blessings of hand-me-downs sometimes appear, there's something very satisfying in making something specifically for your child. While I love knit and crochet, the investment of time alone into the project makes it a precious commodity that I tend to reserve for occasions such as church or the like. But more often than not, my children live in play clothes. I've made (refashioned) several simple play dresses for my daughter, but have been hesitant to share them on here because they're not perfect, not well-finished they're just comfortable play dresses that she will outgrow in a couple months! But for those of you who might have a similar interest and goal, I'll sketch out my quick process. Usually this dress takes me less than an hour, start to finish.
1) Select a shirt: I do this from my give-away pile. Some stains and small tears can be avoided depending on where you place your pattern. Select a long sleeved shirt if you want your new dress to have long sleeves.
2) Trace pattern: take a shirt or dress that currently fits (or mentally add a slight margin if you know you want it bigger), turn it inside out and fold it in half. Likewise, fold the adult shirt in half. Line up he collar and, after you've determined how long you want the bodice to be, trace arm holes, sides and waist, lifting the sleeves to trace the arm holes if necessary. Continue the waist cut all the way across the shirt. This bottom rectangle will be your (already hemmed!) skirt section. If you need to make it shorter, cut away desired strip size from the waist side. Then determine how long you need the sleeves to be and line up the top folded edge before tracing it'sbell shape onto the sleeves of the shirt. Don't forget seam allowance of about 1/4".
4) Sew: With right sides together, I like to start with the shoulders and sides of the top first. Be sure you sew from the collar side toward the periphery on the shoulder seams so the collar is sure to line up.
After this you can do a slight gather on the skirt, but I often just pin the bodice (right side out) to the skirt (inside out over the bodice so right sides are facing) at the quarter marks and then gently gather as I go.
And to finish off with the sleeves, you need to sew the seam the length of the sleeve first, set it into the armhole of the bodice, and (pinned and right sides facing again) carefully sew around.
![]() |
| Variation: with this sweater dress, I omitted the waistline and continued my side seams to the original bottom hem. |
![]() |
| Variation: Use a men's dress shirt (and keep the pockets!) |
| Variation: no waist, higher bottom for shirt style that I did have to hem myself |
Friday, February 12, 2016
Triple Valentines! Free Printables
Victory! For those of you who have not been following of late, I have been having much difficulty with (what I thought) was my printer. After countless hours on the phone with tech support, near tears moments when I just had to walk away for a while, and reboots, I am pleased to say that I printed something today!!! It took a factory reset on my computer, but I think we're finally past this battle.
All this to apologize. I have three Valentines options that I've been wanting to share with you, but have not been able to with this whole fiasco. While I know I've completely missed the school crowd, I'm choosing to still post these in the chance that someone might still be able to use them before Sunday, or save the ideas for next year!
While contemplating this post, I realized that I really couldn't remember the origins of Valentines Day. That meant I had to study up for the multitude of "why" questions that always accompany holidays in this house! I read from History Channel's page that there were as many as three Saint Valentines, but the most popular legends claim one of two events. First, the Roman Empire chose to ban marriage for young men as they found relationship free men to be better soldiers. Saint Valentine saw this as unjust and married young couples in secret. The second thought was that while the young Christian Valentine was in a Roman prison, he slipped a note out to his love and signed it with, "from your Valentine."
1) Entirely Homemade: this one you'll need to start ahead of time a couple weeks to allow the paper to dry. But basically our goal was to buy nothing!
Paper: We saved paper scraps, pencil shavings, and even some natural elements and filled up our blender's pitcher. Then we filled in around it with water and blended it until it was a fairly smooth paste. Then we spread it out as thin as we could on a window screen (that had torn last summer and since been replaced) and waited for it to dry! I set it up on a pan to allow air to flow underneath.
Ink: Leftover frozen blackberries from last summer were thawed, smooshed (kids' favorite part!) and strained into a small jar.
Quill: We used one pheasant feather and one seagull (?) feather, the latter of which had a much larger shaft (could hold more ink).
I somewhat simplified Sun Hats and Wellie Boots' instructions by shearing off some of the down and vane , clipping an angle then clipping flat the tip. Ending with a vertical slit up the shaft.
They loved making little cards with all the elements they had put together all by themselves! I feel like that kind of independence is so liberating!
2) Sunday School Dragonfly: "We love because He first loved us" 1st John 4:19 is inscribed on dragonfly wings to focus on how this holiday of love can even be possible. Two quick slits allow a lollipop stick to weave through to create the body of the dragonfly. Click on the thumbnail below to enlarge and print:
3) Woodland Critters Valentine: This is what my little ones are giving all their friends. I decided to leave the template black and white so each could be colored individually. I think it makes it just that much more special for the recipient! Another option would be to print it on colored paper of your choice.
The same basic idea of two slits is used to weave a pencil through to make sense of the phrase, "Valentine, you're just WRITE for me!" Click on the image below to enlarge and save:
I hope you have such a lovely Valentines day and can find much joy in celebrating the love in your life!
All this to apologize. I have three Valentines options that I've been wanting to share with you, but have not been able to with this whole fiasco. While I know I've completely missed the school crowd, I'm choosing to still post these in the chance that someone might still be able to use them before Sunday, or save the ideas for next year!
While contemplating this post, I realized that I really couldn't remember the origins of Valentines Day. That meant I had to study up for the multitude of "why" questions that always accompany holidays in this house! I read from History Channel's page that there were as many as three Saint Valentines, but the most popular legends claim one of two events. First, the Roman Empire chose to ban marriage for young men as they found relationship free men to be better soldiers. Saint Valentine saw this as unjust and married young couples in secret. The second thought was that while the young Christian Valentine was in a Roman prison, he slipped a note out to his love and signed it with, "from your Valentine."
1) Entirely Homemade: this one you'll need to start ahead of time a couple weeks to allow the paper to dry. But basically our goal was to buy nothing!
Paper: We saved paper scraps, pencil shavings, and even some natural elements and filled up our blender's pitcher. Then we filled in around it with water and blended it until it was a fairly smooth paste. Then we spread it out as thin as we could on a window screen (that had torn last summer and since been replaced) and waited for it to dry! I set it up on a pan to allow air to flow underneath.
Ink: Leftover frozen blackberries from last summer were thawed, smooshed (kids' favorite part!) and strained into a small jar.
Quill: We used one pheasant feather and one seagull (?) feather, the latter of which had a much larger shaft (could hold more ink).
I somewhat simplified Sun Hats and Wellie Boots' instructions by shearing off some of the down and vane , clipping an angle then clipping flat the tip. Ending with a vertical slit up the shaft.
They loved making little cards with all the elements they had put together all by themselves! I feel like that kind of independence is so liberating!
2) Sunday School Dragonfly: "We love because He first loved us" 1st John 4:19 is inscribed on dragonfly wings to focus on how this holiday of love can even be possible. Two quick slits allow a lollipop stick to weave through to create the body of the dragonfly. Click on the thumbnail below to enlarge and print:
3) Woodland Critters Valentine: This is what my little ones are giving all their friends. I decided to leave the template black and white so each could be colored individually. I think it makes it just that much more special for the recipient! Another option would be to print it on colored paper of your choice.
The same basic idea of two slits is used to weave a pencil through to make sense of the phrase, "Valentine, you're just WRITE for me!" Click on the image below to enlarge and save:
I hope you have such a lovely Valentines day and can find much joy in celebrating the love in your life!
Thursday, February 4, 2016
Expecting Joy (and Nausea): Morning Sickeness Gift Basket
Havin’ a Baby!
(Morning Sickness Basket)
No not me! =) My dear
friend just, JUST found out they were expecting baby #6! Wow!
So excited for them! With so much joy, she’s also experiencing the
common morning sickness (though you wouldn’t know it by looking at her! That woman has endless energy!) Those of you who’ve had to deal with that
know it’s miserable, especially when you want to be soaking up life and
cherishing every moment!
![]() |
| Eagerly Expecting |
I’m going to insert a little excerpt of my first pregnancy
here so you know where I’m coming from.
I should clarify. My first
successful pregnancy. My very first
pregnancy was a couple months prior and (this never stops hurting!) our first
baby went to heaven in the second month.
But, to encourage you who are having morning sickness, it usually means
that your baby and your body are progressing healthily! So when I started feeling “off” a couple
months later, I took a negative home pregnancy test. A little discouraging, but I understood these
things take time. But a couple weeks
later, I started crying profusely at a TV episode about the Iditarod (I’d
almost NEVER cried at any movie!) and Josh said I should retest. Sure enough!
Our little guy already had a beating heart by the time we were even sure
he existed!
What joy and excitement!
And then came the morning sickness, gradually progressing through the
first couple months, then intense until the last couple. I ended up feeling sick nearly the entire
pregnancy and actually had hyperemesis gravidum (extreme morning sickness) with
my first. I lost more weight (25 lbs)
though the second trimester than I gained in the whole pregnancy. Even sounds could set it off! It was so weird! I couldn’t even listen to some of my favorite
music because it made me so nauseous!
Anyway, raw ginger was the only thing that would touch it. I would seriously chew on it raw. Now the idea of that nearly makes me sick! =) When it reached the clinical
level, I did accept a prescription medication for a couple months so that I
could continue working and maintain a healthy pregnancy.
![]() |
| He arrived! |
There are a lot of suggestions out there about how to ease
the symptoms of nausea, but they can have different effects on different
individuals, even different pregnancies!
I was only minimally nauseous with our daughter and I only threw up once
(and that was on a very turbulent, windy jet landing in Seattle!)
So in putting together a little basket for my friend, I
definitely wanted to include ginger, and I found a recipe for homemade ginger
ale sweetened with honey to include. You know, to whip up in all
her spare time. Yeah, I’ll throw in some
pre-made, too. =) Just want to make sure it has real ginger in
it. Many brands now don’t. I got
ginger capsules that some pregnant friends swore by, but they didn’t touch my
nausea either pregnancy.
Peppermint, my other lifesaver, is also a must. Peppermints are good, but sometimes just the
sweetness is counteractive in this case.
Peppermint oil is very helpful.
Have you ever tried acupressure? I feel like it made a dent in the nausea
sometimes. Was it just a mental
change? Possibly, but whatever works,
right? Pressing two fingers against the indent
of the inner side of your wrist (just before your thumb) can be helpful.
Fresh or frozen lemon can alleviate the symptoms of morning
sickness, also. To use the whole thing,
cut a small slice from an end to suck on, then place what you don’t use in a
day in the freezer and keep slicing off pieces as you need them.
Cold: while it was winter in Fairbanks, it was so nice just
to be able to step out on the porch for a breath of fresh air. When that’s not available, a cold pack around
the back of your neck can really help!
These can later be used as heat packs for any painful cramping! I found this easy, inexpensive pattern for one from Satsuma using dollar store socks!
Breathe and try to relax: anxiety can increase nausea
Finally, hydration.
This can be super hard when anything at all in your stomach makes you
want to hurl, but as much as you can, keep yourself hydrated. Sucking on ice chips or taking tiny sips
seems to help.
What have you found to be most helpful in alleviating
morning sickness? Any other ideas for
the next basket?
Note:
this was written some time back, but I am revising it for another friend
currently expecting!
Subscribe to:
Posts (Atom)


