Pages

Friday, August 28, 2015

5 Ways We Took Preschool Beyond the Books--Our First Week!


Four years old and incredibly excited to start school.  Well, in his words, he wanted to “go to university” but we explained to him how he had to take first steps first.  It feels like we are always teaching him new things and he’s just a little sponge anyway, so preschooling at home seemed like a great idea to me, too!  So we got tiny backpacks (sister couldn’t be left out), some basic supplies, and a few simple work books.  We added in what we already had at home (crayons, glue, ruler, scissors, “science” books) and his anticipation was tangible!

We weren’t going to start until the local schools did, but I realized his excitement was not going to allow his supplies to wait at this point, so we set a start date for the following Monday.  At last the day arrived and he powered though all his lessons and put his stickers on his chart like a champ!

As I woke him up for our next day of school I told him with enthusiasm, “and we get to do school again today!”  To which he responded, “MOM, do we HAVE to!?”   Really!?  That was all I got!?  ONE day of excitement about school!  Boy, I was going to have to get creative, and quick!  =)  Thankfully, as soon as we started, he was really into it again.  But it definitely got me thinking about how I was going to keep this boy engaged.

So with that, I bring you our second week of preschool:

1.       Stick Letters:  Thankfully he can form his name with mostly straight lines.  Our only trouble was his sister trying to rearrange the letters to suit her own creativity!  I’d like to try this again with other new words as he learns them.


2.       Insect Anatomy: As we read about the basics of insects this week, we decided to grab a bag and collect whatever little pieces we thought we might be able to glue down.  We counted antennae, wings and legs of our newly made insects and found symmetry in that the insect would have the same number of parts (legs/wings/antennae) on one side as it did on the other. Then we were able to examine a couple live ants in our driveway!
 
 
3.       Chalk Tracing:  I know not everyone has a place to scrawl on with chalk (this is the first time we ever have!) but could be done just as easily with crayons/markers on paper.  This is all over Pintrest, but the idea is that you write a simple word (I did mine in a pale yellow so he could really see his red or blue chalk over it.  Then we would talk about the sounds each of the letters made and blend them together until he read each word!  This last step took a little determination, but he was so excited when he did finally READ a word!


4.       Rendering Lard: I’ll be writing a post about this later, but this was a fascinating experiment!  For those of you who do not know, lard is pig fat that is rendered through a slow heating process.  It’s used like shortening in baking and is making a comeback for it’s natural, healthful properties (Lauren goes into that in a little more detail on her page).  Anyway, this led to some interesting conversations about what lard was, and then what fat was, why our body needs it, but not too much, and what was left over after the lard was removed (small portions of muscle, blood vessel, and tendon) and then their role in the body.


5.       Baking:  I’m not going to lie, here: baking with these wee ones can be super stressful sometimes.  I’ve come to realize that many recipes are more forgiving than they let on, because there is no way we ended up with the right proportions of the ingredients!  But, we were able to use some of our fresh lard to make snickerdoodles (having cookies as an end product is always great inspiration to be a good helper!)  Although they don’t understand the fractions or even the measurements yet, we talked about them and he was really pointing out which measuring cups were bigger than others and asking about why we needed one teaspoon of salt instead of one cup! 
 
We still did our work books, science reading, and bible verses, but doing the extras and taking it outside sure kept him focused longer.  And with much more enthusiasm!  I hope these ideas have sparked some ideas of your own!  What have you done to keep your little ones engaged?  I would love to hear how you find ways to incorporate real life into your school!

Tuesday, August 25, 2015

Lovely, Effortless Lemonade (Plus Flavoring Syrups!)


Sitting out at our lemonade stand was such a joy!  Not only did I get to hang out, do preschool, read and sing with my little ones during the down time, we also got to meet many of our neighbors and just hear the stories of passer-bys.  One couple were even missionaries from Africa here on leave!  As they drank their lemonade, they told us about how the believers were faring in their area and the woman commented, “There, now you have refreshed us with lemonade, and we have refreshed you with news of your brothers and sisters in Africa!”  And it was true!  

It was perfect!  This was the page we were doing in his preschool book!
 
We had several people just want to take pictures of our stand (feel free to read up on the instructions for the lashed branch stand) and nearly everyone comment on how pleasantly surprised they were that the lemonade had such wonderful flavor.  I actually had to agree.  That sounds totally conceited, but let me explain.  I really don’t like lemonade.  I know it's horrible, but I’ve just never really had much of a taste for the drink.  So for me to admit I like it is saying something.  I had several people request the recipe on the spot and it was easy to give because the recipe was so simple.  The kids and I tried to restrain ourselves, but we still ended up drinking about a quarter of the lemonade we made.

The thing is, I didn’t feel bad at all because it was SO easy to make!  No squeezing lemons (or having them squirt in unfortunate directions) and only three ingredients IF you're counting the water.  I made another huge batch the next day for our church painting party and another one after that just for us.  I adjusted this lemonade recipe a bit to make a simple lemonade for us to sell and then I made a couple flavoring syrups to allow visitors some options.  But first, let me share with you how I made the lemonade:

You’ll need:

·         3 lemons

·         ¾ cup sugar (or 1 cup honey)*

·         6 cups water


·         Blender

·         Strainer

·         Pitcher

Set 1 ½ cups of water to boiling while you quarter the lemons and toss them into the blender.  When the water is hot, stir it into the sugar to dissolve, then pour it into the blender as well.  Add remaining water (if it doesn’t all fit in, you can add the rest to the pitcher.)  Start out on lowest setting and allow blender to agitate the juice from the lemon quarters for a minute or so.  I waited until the water was just becoming opaque. You don't want to grate the rinds.   Then pour through strainer (to catch all the rinds and seeds) into the pitcher.    Cool (or ice) and done! 

*I want to note, this will yield a fairly sweet lemonade, so if you prefer it to be more on the tart side, you may want to adjust this amount.

Just kitty-corner from our house is a farm stand called Me and Moore that sells the most amazing peaches right now!  They’re seriously like candy!  The kids, Clancey dog and I walked over and got a bagful.  They found some pretty little wildflowers on the way and each picked one for the lady who always works at the counter.  She’s such a sweetheart and always has a nice conversation with the kids when we’re there!  Once we got home, I followed this recipe for the syrups:  I didn’t know at the time that the lemonade would be able to stand on its own!  But it’s still fun to add a little flavor, even if just for variety’s sake, from time to time.  In fact, nearly everyone who came by requested flavoring added in.  A spoonful or two was more than enough for the flavor to come through.

Ingredients:

·         3 cups fruit

·         1/2 cup sugar

·         1 cup water

Bring the water to boil in a saucepan.  Dissolve sugar into boiling water, turn down heat to medium, then stir in fruit.  Allow to simmer for 5 minutes or until it has thickened, stirring intermittently.  Pour into jar and refrigerate until use.

I did a batch of strawberry also and they both turned out so tasty!  And they looked so cheery sitting on the stand together!  I understand life is sometimes too crazy even for this, but I picked up another flavoring cheat I wanted to pass on if you need to save some time: jam or preserves!  I had a little bit of my mom’s blackberry jam and just added a splash of water to a spoonful to thin it out a bit.  Stirred into the lemonade it turned out great! 

If you're looking for another syrup recipe, Sweet C Designs makes a very similar version that looks super yummy, too!

Anyway, I’m so glad we decided to tackle this adventure! Have you ever had a lemonade stand?  This endeavor really got me reminiscing.  I grew up near the end of a long dead-end road, so a full-blown lemonade stand wasn’t really an option.  But a few friends and I created the “Berry Berry Bunch Club” when we were barely in grade school.  We diligently picked all sorts of wild berries and made concoctions by smashing them or mixing them into juice we had swiped from the kitchen.  We put the drinks into tiny cups and sold them for a nickel to anyone who would give us the time of day!  Wow, fun times, though…

Alright, then!  Let's reel it back in from the reminiscing rabbit trail!  I hope you're having a great week and I'll leave you with this gem:
"TASTE and SEE that the LORD is good!  How blessed is the one who takes shelter in Him!" Psalms 34:8

Friday, August 21, 2015

Lemonade Stand! And My Lessons in Branch Lashing...


The last bittersweet days of summer…

…are still incredibly hot!  It was pushing 100 degrees as we sat at our lemonade stand.  Which, I suppose, is good weather to have a lemonade stand in… either way, it was a much more preferable event than my trial and errors of making the stand itself!  So I wanted to share my experience with you with the hope that you might have an easier go of it. 


It all started when I read to our little guy about a lemonade stand in one of his books. We talked about it a bit and he (okay, we) got really excited about the idea!  We talked about how it would work and flavorings we would make, and when he asked, I told him I would see if we could make it work. 

First, I asked our landlord if it was even okay, then set to planning.  I’m not going to lie; my first plan failed miserably.  It wouldn’t even stand up.  So I’d like to tell you what not to do and then what worked for us. 

So, if you read my post about our fort (here) you’ll recall we have a ton of fresh, strong branches from a recent tree trimming and I thought they might make a cute, rustic sort of lemonade stand, too.  Josh insisted that lashing the round logs was the best way to secure them, but he showed me the right way to do that this time.  I’ll pass along that bit of knowledge in a bit, but first I’ll explain my failed design:  four upright posts, two braces on each side and a couple angled supports.  In the end, I had to back track and take several pieces off to make it a sort of A-frame.  Another gem Josh taught through this experience is that triangles are sturdier than squares/rectangles.  MUCH sturdier, though it still sits at a bit of an angle on our uneven ground.  But, it worked fine and I still like how it looks. 

So here’s the bit about lashing that I found very helpful and hope to use again in the future: I started laying the branches (each about 6 feet long with a 3 inch diameter) out the front on our patio (propping them up on paint cans made for some extra elbow room) and lashing the cross beams to the uprights.  So, we started with a clove hitch.  The best way I can describe that is to wrap your twine around one branch twice so they cross with a long tail.  Where the twine crosses, slip the tail under both sides and pull tight.    Easy peasy.

For the long beams across the front, we did square lashings, meaning I would go up and over the branch on top, down under the branch on bottom, then over the top on again on the other side.  Basically going around instead of cross.  Hopefully the photo can explain what I can’t with words.  I followed this pattern about five times over.

To add strength, I was advised to keep the twine as neat and snug as possible.  I’m afraid I didn’t achieve either to the degree I would have liked, but each one was better than its predecessor.  When the five times over-under-over-under pattern is complete, it can be tightened even more by doing the opposite: over the bottom, under the top.   About five times around again. This takes up much less twine each round because you’re only circling around the first batch to tighten them in together.  Again, I’ll have to refer you to the photo.

Once you’ve tightened the lashing, complete with another clove hitch and there you have it!  I did a slightly different pattern for the shorter braces going front to back.  The only difference is that after the starting clove hitch, I did a cross over back and forth so that they will support the board, still finishing with the tightening portion and ending in another clove hitch. Then lash the tops together in the same way and you’re done with the frame! 

I did add some kitty-corner braces in the front upper corners to give even more stability.  We laid a board across the top and decorated a little with table cloth, pendants, and sign (instructions to come for this one!  SO easy and fun!) 

This was by far the hardest part of the adventure.  Especially since we had to backtrack a bit there, but now that I’ve made that mistake you can save yourself the headache of it!  In the end, the materials I used were:

·         6’ long branches x 5

·         2’ long branches x 4 (2 for the front to back beams that held the counter, 2 for the corner supports)

·         12” board (ours was only an inch thick and 4’ long, but this could vary for you so long as it fits between your frame braces)

·         Lots of twine!  I used about half a skein.

·         A little scrap fabric if you choose to decorate

Total cost: $12 –but this was only because we had to buy that silly board and twine new.  Do you have something already laying around your house that would work?  Maybe you could make it for even less!  I was looking at lemonade stands online and all I found were well over $100.  Very well constructed all and would probably last forever, but I didn’t feel like we needed that. 


And, what I think the best part about this project was, the kiddos were able to help and learn along with me.  They helped pick the straightest, strongest branches, haul them to the patio, set up, and pick up all the stray strings and branches.  We had so many people comment on how much they liked the uniqueness and style of our stand as they came to visit and many random visitors took photos!  Of course, it was probably just for these two cuties sitting behind the counter! =)

I hope this helps you create your own stand at some point, even if you’re on a budget (be it time or money) and can save you a headache or two!  Coming up on Tuesday: an amazingly simple lemonade recipe that tastes amazingly good!  I’ll even throw in a couple flavoring syrup recipes, too! Stay tuned!
 
In need of more inspiration for simple lemonade booths?  Check out an adorable pallet one here, or this sweet one made of painted cardboard!

Tuesday, August 18, 2015

Sweetie Slippers-Quickest, Comfiest Crochet Toddler Slippers


What!?  Slippers! It’s still summer for Pete’s sake!

I know, but hear me out:  We’ve been unpacking and our little laddie unearthed his adorable red slippers created by the talented Rachel Zachary.  They’re his favorite so he put them right on his feet and went to prance around the house.  Well, this was terribly unfair in the eyes of his sister!  So I took her to my yarn stash and she picked out two colors of yarn.  Oh!  She was so excited she just squealed and ran around the house with a skein of yarn under each arm!  During her nap the next day, I whipped up one slipper after looking at her brothers pair a bit and perusing some patterns online (see these cuties!)  When she woke up, she was so thrilled that she wore just the one slipper the rest of the evening!  The match was finished the following nap and right now it’s pushing 100 degrees outside and my daughter has her slippers on! Silly girl, but it’s nice when your work is so appreciated!  I made them a little big so they’ll (hopefully) fit through the winter.

Actually, I think I'm still on my Alaskan internal clock to some extent.  Even though it's crazy hot here, I'm seeing photos of my Fairbanks friends all bundled up in coats and hats already.  This is the time of year we're used to preparing for a long, deep, and cold winter.

Anyway, I was just telling my mom about this project and how, at this stage in our lives, I rarely complete a project that isn't super quick, can be dropped at any time for the random emergency, and terribly useful.  This project definitely fits those guidelines and I love that it is still lovely and fun.  In fact, as soon as I finished hers, I picked out some greens to make myself a pair!  Awesome way to use up some yarn remnants, too!
I used two yarns at once (first time I’ve tried this technique) and I really love how they join together and how thick and warm of a texture they create.   I haven’t written many patterns before so if there’s any confusion, please shoot me a message!  This pattern is for a size 6, but they could easily be adjusted for larger feet, I would imagine.  To make a larger size, I would repeat round 3 1-2x, then repeat row 12 until it is long enough.                                                                                                                                                                                                                   

Sweetie Slippers                                                                               

Round one: 6 DC into magic ring.  Tighten and join to first.
 

Round 2: Ch 2.  2 DC in each sp. (12)  Join with slst.

Round 3: Ch 2. (2 DC in next sp.  1 DC in next sp) around. (19)  Join with sl st.

Round 4-6: Ch 2.  1 DC in each sp around.  (19)  Join with sl to.

Row 7-12: Chain 2, turn.  DC 13 across.


With right sides facing, join the back of the heel with slip stiches.  Fasten off.

Join to top of the heel seam with a sl st.  Chain 2


Round 1: (DC in each sp) 9x. DC 2tog.  DC in next 5 sp.  DC 2tog.  (DC in each sp) 9x.  Join with sl st.

Round 2-3: Ch 2.  DC in each sp around. (24)  Join with sl st.

Fasten off.  Weave ends.


~Hindsight note: now that she's worn these a few days, I'm seeing that they're rather large around her tiny ankles.  They stay on fine, but if I were to make them again, I would do a few more DC 2togs in the second to last round.

If you decide to give this pattern a try, I would love to see how it turns out for you and how you might choose to make them uniquely yours!  Would you send me a photo?  Happy creating!

Friday, August 14, 2015

Simple Bough Fort DIY

 
We were explorers, braving the wilds, discovering new creatures and landscapes.  Danger awaited behind every corner.

We were natives, hunting and gathering for our meals, tending our lodge and our fire.

We were gypsy rovers, tinkering and creating beautiful items from the things we brought out of the forest.

But always, our base of operations was our fort. 

When we were growing up, every spare minute was outside and a good portion of that time was building and maintaining forts out of whatever we had.  Then I got married and found this was a good portion of my husband’s childhood as well.  Of course he was a boy scout so he knew the “right” way to make them!  Most people I talk to seem to have some good memories of forts in their childhood.  I love that making a fort can mean so many different things, be it a sheet over some chair backs, a platform up a tree, a timber-built structure, or a plastic, store-bought  cottage!  We even called some low-hanging cedar boughs (where they sweep the ground clean underneath when the wind blows) forts from time to time.  When we were packing to move down here, we made the young 'uns a fort out of packing boxes!  Isn't it great how the desire to build a shelter can spark the creativity in us!?

And how can you not love them?  A secret place, just the right size for you that can ignite so many imaginary scenarios?  I have been looking forward to sharing this joy with my children for some time now and the opportunity arose this week when our landlord trimmed the lower branches of the many trees on our property.  These fresh sturdy branches were perfect for fort constructing!

Starting out, I was way more excited about this project than my children.  But I decided to just keep at it knowing they would enjoy the finished product (and I was just having so much fun!)  They did eventually join in once they saw the fort begin to take shape.  Then yesterday when we came home from running errands, as soon as they jumped out of the truck they were begging to go play in their new fort!   Their excitement is so encouraging!  I adore what they come up with on their own when they are just outside with nothing but creation and imagination!

In case you should be so inclined (and I do hope you get the opportunity), I've outlined our process.  Of course it will look different for you.  Or even for me if I tried to do the same thing agin.  Every fort seems to be unique.  Unique materials, design, creators, occupants... 

To start, we gathered branches and set the cross beam.

 
Then we angled branches to form the walls.  This was a little easier said then done as our big moose of a dog, Clancey, thought all these branches ought to be his.  He would grab these huge sticks in his mouth and try to run off with them.  He even grabbed at the ends of ones I was carrying!  No doubt these were preferable as they were no longer stationary! 


After we had a bit of a frame we lashed them all together (don’t laugh, Josh.  It works =) 


The face of concentration

We added more branches to the walls and soon we were weaving smaller, more malleable branches in between the larger ones.

 
Blackberry break!


Look at that shirt!  This girl doesn't mess around in her creative play!

Time to set up camp!


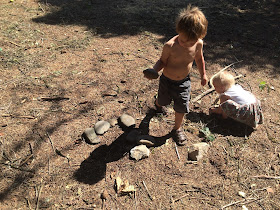
Constructing their "fire pit"


Testing the door.  Again.


Let the adventures begin!


They started off being "discoverers" who got their supplies together, set off from camp and (you guessed it) made discoveries!  Many new bugs, fruits, and rocks were discovered this week!  Not long after, they had morphed into rescuers and were seeking out people who might need their help.  Love their hearts!


My only regret is not setting aside some of the cedar boughs to thatch the walls with!  They carted them off before I even considered that step!  Oh well, my mighty adventurers don’t seem to mind their extra windows!  Well, there it is!   Using what was on hand to make their first outdoor fort!  Do you have a fort sitting outside your house?  How did you construct it?  I would love any other ideas for thatching; I am drawing a blank! 
If you're ever in need of fort inspiration, there's of course some awesome boards on Pintrest.  I have several on one of my boards A Time to Go Outside,  but I also really love what Jaden put together on this one!  Wow!  Some of those constructions are incredible!  Kind of makes me want to just live in a fort for the rest of my life!  Yeah, I never really grew out of that stage! Also, have you read Allison's blog about Fun Fort Friday on her page here.  TONS of great fort ideas here!  Happy exploring!